Wedding Photography

Wedding Photography

Etiquette, styles, key shots, and editing techniques specific to weddings...

Bo and Adriene

Engagement Photography

How to shoot engagement or couple photos that catch feeling and emotion.

Best of the Best

Portfolio

How to make a portfolio, and what to put in it...

HDR

HDR and Advanced Techniques

Learn advanced photo techniques like HDR and editing tricks!

Choose 2!

The Business

Marketing and advice about the business side of photography

Friday, August 14, 2009

What Do I Shoot In The Wedding Off Season?

Posted On 8/14/2009 03:29:00 PM by suctionhorse 0 comments


Everyone photographer goes through a lull or off season especially in the wedding photography business. Typically spring and summer are the peak times for wedding photographers and fall starts the slow down into "dead" winter (as I like to call it). During these times photographers get the equivalent of writers block and the creativity just doesn't seem to be there. Try some of these ideas during your down time...

So, what do you shoot during off season?
  • Fun, Themed Portfolio Stuff - pick a theme and shoot as many pictures as you can using that theme. Even though this won't directly make you any money, it will boost your portfolio and keep the creativity churning. Some examples of cool themes are: pick a color, something dirty, shiny things, old people, people that work in restaurants, people that work in gas stations, flowers, etc.
  • Shoot business head shots - shoot head shots for business people that need profile pictures for their new found social media sites.
  • Shoot kid portraits - get the word passed around your local church or new mothers at work that you'll give them a discount on a kid session at the local botanical gardens.
Hopefully these ideas will give you a boost this fall. Don't let the seasons get you down! Keep the creativity up!


Monday, June 1, 2009

How To Be A Good Subject of A Photo Shoot

Posted On 6/01/2009 01:07:00 PM by suctionhorse 0 comments

What are some things that your subjects have done or worn that have made you cringe?

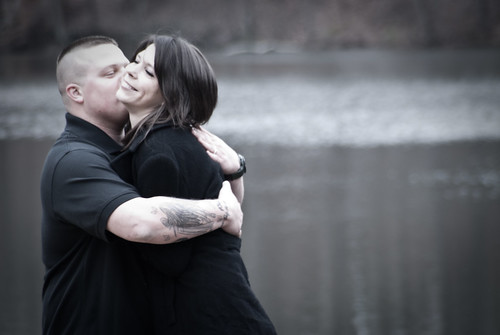
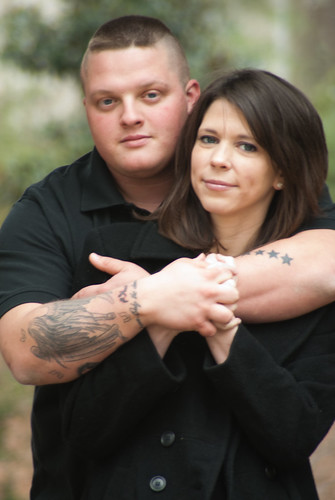
Yesterday I had the chance to have the tables turned on me as I posed with my beautiful fiance for our new engagement photos that our photographer Shannon (of Shannon Ludlum Photography) shot. She had some great ideas and I'm sure that they will come out great, but I was having a hard time making myself not think about framing and focus and location details, but she did a great job of putting us at ease and having fun so she could get some great photos for us.

As a portrait and wedding photographer you WILL run into bad colors / clothing or just general ignorance on the part of your client, so I'm going to help you prepare for how to deal with unruly clothing or behavior from your subject and if you are ever the subject you can more easily show or tell your subjects how to BEHAVE . First I'll give you what you should do as a photographer and then what to expect if you are the subject.

The behavior isn't on purpose

... so don't blame the subject. If anything, blame yourself for not telling your client about these rules before hand. Most wedding couples or solo portraits have not had much camera face time if any at all, so be prepared to give detailed instructions or have a good "beside manner" (as if you were a doctor) and keep your subjects smiling, laughing and in a good mood in general.

If you are the subject: remember that you are not expected to read the photographer's mind or be a professional model, just take direction and don't be stubborn. Your photographer knows how to make you look good and is putting you and posing you in the best way to make sure you stay that way.

Put your subject at ease

This is a tricky technique and is easier for some photographers than others. Basically you chit chat with them and develop a rapport with them. Make jokes (have some jokes pre-planned) get them to be playful with each other. This includes tickles and neck kisses ;-)

If you are the subject: don't be nervous. Be yourself and just have fun. Breathe. Stop worrying how the pictures will come out and let your photographer do their job.

What not to wear

You may have seen a book or TV show about this. As a photographer you know that there are certain colors and styles of clothing that look horrible in photographs. Be sure to let your clients know ahead of time "what not to wear" to their photo shoot. Don't assume that they've read up on it. So here are some colors that are not so great on film:
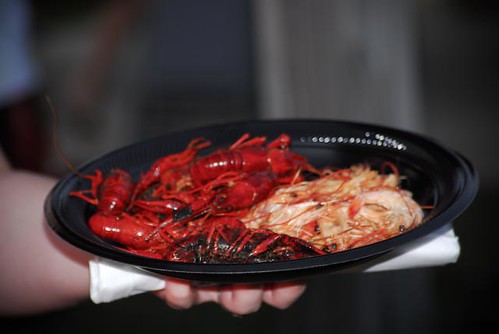
  • Bright Red (or any red) - red bleeds on film. Digital sensors handle it a little better but its usually too much contrast for the human eye and your eye bleeds the color in your brain. STAY AWAY!
  • Bright or fluorescent yellows, lime greens, etc. - The 80's called... they want their clothes back
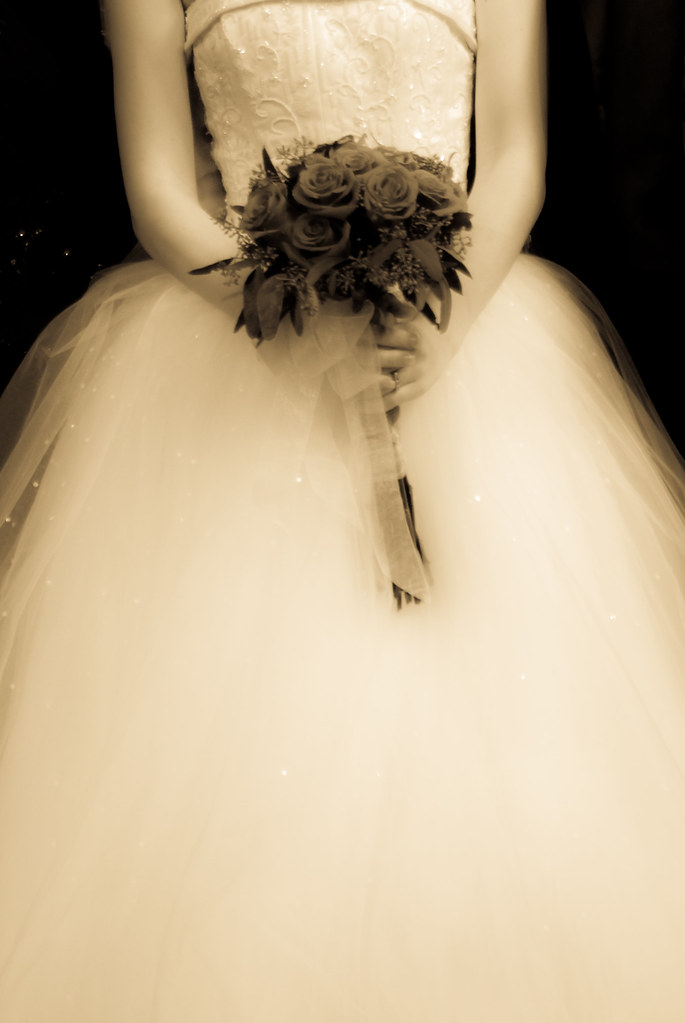
  • Pure White - white is a great contrasting color but most digital meters have a hard time reading the correct exposure and thus under or over exposes the white making it blow out and losing the detail of any folds or patterns in the material. Tell your clients to stay away from pure white unless you plan on doing some time consuming hand metering every other shot.
  • Large stripes, bold designs, polka dots - while not a problem for sensors, stripes and polka dots either make people look fatter than normal or skinnier than normal. It is also distracting to the viewer, where you want the focus to be on the face of your subject, not the beer gut.
  • Funny print shirts - or any interesting artistic designs. Tell them leave their hilarious Borat t-shirt at home. Because that's all that a viewer will notice and laugh at when looking at the picture
  • Trendy / Hot /Goofy designs - tell your clients to keep it more traditional and subdued. Not that they shouldn't wear something striking or vibrant, but they need wear something that won't distract from their faces and eyes.
  • Short sleeves / tank tops / shorts - if you're not a professional model with a perfect body, stay with pants/jeans and slightly loose fitting short or long sleeve shirts/tops. Lots of skin flopping around isn't attractive.
Basically some great colors would be:
  • medium to dark greens
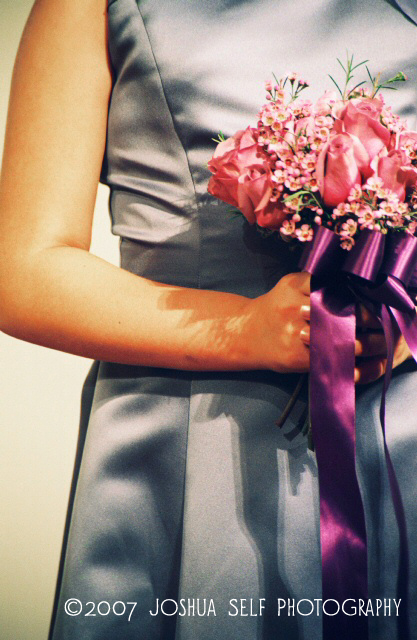
  • purples
  • khaki
  • blues
  • browns
  • black
  • creme whites
I'm not going to pretend to know everything about women's fashion (maybe some of the ladies could share some good options for clothing in the comments section?) but I'll give some advice for guy's clothing.
  • Blue Jeans: good fitting but not too loose or too tight (no skinny jeans)
  • Black button down shirts, long sleeve
  • Nice plain polo (no logos) in the above colors (if you have decent looking arms)
  • Casual but modern suit coat (not buttoned)
DO NOT wear:
  • "Urban Wear" - sagging, big print shirts, poorly made clothes
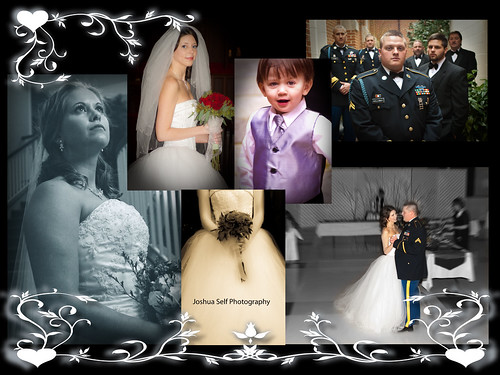
  • Camouflage - if you are a real soldier, wear your dress uniform for pics.
  • weird ties - bolos, Sponge Bob, Tabasco
  • popped collar polos or layered polos - save that for the frat party
The final details that most people don't think about till the last minute are:
  • Hair - bring some hair gel or hairspray and a comb or brush with you to the shoot.
  • Makeup - obviously for the ladies but some concealer (for blemishes or zits) or translucent powder will do wonders for the guys as well. The powder keeps the shine off your face and forehead. (just ask your wife/girlfriend to borrow some). Its done in Hollywood and on TV all the time guys, don't get too weird about this.
So, remind (or even print out this handy list for) your clients before their photo shoot and you'll have a great time and everyone will look hot!


Friday, May 1, 2009

Lightroom Plug-Ins for Flickr and Facebook

Posted On 5/01/2009 01:04:00 PM by suctionhorse 0 comments


For those of you using Adobe Lightroom, I am going to keeping you up to date on the inside workings of Lightroom and showing you how to use some of the more powerful features of the coolest photo editing software out there.

First of all if you are a wedding photographer and you don't have Lightroom. You can buy it here from Amazon:


Once you already have Lightroom, try these great plug-ins created by Jeffrey Friedl. These are available as a free download from his blog:

Both of these are free to download and use but after a few weeks, if you don't "donate" the batch usablity is shortend to 10 photos or less at a time. Still good enough for most of us out there who aren't uploading massive shooting projects to Facebook. But I would definitely suggest donating to Jeff's cause. He spent alot of time working on these plug-ins and they are a huge resource to all Lightroom users.

On to the installation...
  1. download the plug-in
  2. unzip the plug-in
  3. move the plug-in folder to your Lightroom Plug-In directory
  4. Open Lightroom and go to File -> Plug-In Manager
  5. Click on the Add button
  6. Find the Plug-in directory where you saved the unzipped Plug-in and select it.
  7. The plug-in should install itself
  8. The first time you install it it will ask you to verify and authenticate with the service you are using. So, you will have to put in your password.
  9. after that, you will be able to use the plug-in in your Export feature. Be sure to click on the top menu bar to select which plug in you want to use or edit.
Next, Cool Develop Presets for Lightroom...


Friday, April 24, 2009

Networking With Other Wedding Freelancers

Posted On 4/24/2009 02:41:00 PM by suctionhorse 0 comments

A big part of getting new business when you are first starting out as a wedding photographer, or really any freelance business person, is to network with other freelancers in your circle of influence. The easiest way to do this is to talk to the other "work" at the next wedding you shoot and be sure to have some business cards on hand to pass out (don't be stingy!). Some good candidates for wedding networking are going to be freelancers or businesses that you can "trade out" services for:

  • Cake makers / bakers - These guys/gals need you! They need professional photos of their cakes and baked goodies for their portfolios. Offer to take some free high resolution, well lit shots of their next wedding cake for free as an incentive for their good word to the next bride or MOB/FOB about how AMAZING your wedding photography is. This is a win-win because you can use these shots for your portfolio as well as getting some great word of mouth recommendations.
  • Caterers - same as cake people, caterers have portfolios that usually look like crap and would love to have some pro photos done of their "spreads".
  • Flower Shops / Arrangers - these people work with their bride's artistic and creative side and will be willing to suggest you if your style is compatible with the bride's flower and color scheme.
  • Wedding planners - getting in with a few high profile wedding planners is HUGE. You will always be booked up, because these people make all the important decisions for the wedding that the parents or couple don't want to make. The wedding planner will have a huge influence on these type of weddings and if you're really that good, the planner will always suggest you. Examples of trade-outs with a planner can be things like professional head shots for their public image and wide shots of the final put together reception hall or auditorium for their portfolios.
  • Musicians - do a few artsy shots of the band next time and forward them on to the leader with a hopeful note that they would recommend you or link to your pictures on the band's website.
  • Officiants / Pastors - Don't ever tick off a pastor. Do the opposite. Make sure the pastor's wishes are followed to the T and if you have time offer to do a free head shot or two and some great look exterior shots of the church for the church's website with a nicely worded request for a link to you. The trick is to get your name floating around and be the first choice in the pastor's head when he thinks of "photographer".
Anytime you talk with another wedding business person or freelancer, hand them at least 2 business cards and tell them to feel free to pass the others along to potential clients. Soon you'll have clients calling like crazy to meet with you. Put your name out whenever and wherever you can!


Monday, March 23, 2009

Please Take A Brochure

Posted On 3/23/2009 03:16:00 PM by suctionhorse 0 comments

Another piece of the marketing puzzle for your wedding photography business should be a professional looking brochure. A brochure will help those clients that maybe don't have access to your online portfolio or older clients (MOBs and FOBs) who may see a brochure as an indication that you are an established photographer with a marketing plan behind you.

Basically a brochure is a glorified business card, but it can be so much more:
  • a mini portfolio
  • mission statement / who you are
  • services you provide
  • the who, why, how of your services
  • a call to action
  • provide helpful hints
A call to action is one of the most important things to include in your brochure. A call to action is a statement that nudges your potential clients to become actual clients. For example:

Call or email me today to meet with me and see my portfolio!

Take a few minutes to complete and send in this questionnaire about your preferences and we'll send you a coupon for 20% off!

Send $5.00 to start your trial of my new marketing plan! Cancel anytime!

Offering incentives (like the second CTA) can often prompt "fence sitters" by creating something of value they can get for free.

Your brochure doesn't have to be just a standard tri-fold layout. It can be any shape or size. Be creative! The more creative you are, the more your brochure will stand out!

I create my own brochures but there are many online retailers and local print shops that will make them for you very cheaply.

Steps to making your own brochure:
  1. read up and be familiar with basic graphic design for brochures
  2. use a good graphic design program like Adobe Photoshop or Illustrator.
  3. use a template to make sure your measurements are correct as to where to the folds go
  4. include your business' name on the front flap and whenever possible on the inside
  5. include a "mission statement" or a description of your services to your potential clients
  6. don't get too cluttered or busy (see #1)
  7. remember you have to design the inside and outside. They are both opposite each other.
  8. take to Kinkos or other photocopy store and get them to do one double-sided test print to make sure both sides will match up.
  9. when everything is perfect print out a good 50-100 so you won't have to go through all this hassle again later
  10. crop and chop if needed, then carefully fold at your fold lines
  11. hand them out and watch people get impressed!
So, please... make a brochure!

(graphic by Seattle Municipal Archives from Flickr)


Friday, March 13, 2009

Today's "What The Duck?"

Posted On 3/13/2009 11:01:00 AM by suctionhorse 0 comments

I always love this guy's comics. Please check him out and subscribe to this comic strip if you're interested in photography!

I'm working on a few new articles for TheWedding PhotogBlog in the next couple of days so stay tuned. I hope a little WTD helps fill the void for now. Thanks for staying tuned!


Thursday, March 5, 2009

Essential Adobe Software Updates Today!

Posted On 3/05/2009 11:18:00 PM by suctionhorse 0 comments

I just heard that today Adobe has released updates for Lightroom, CS4 and their Camera RAW plug-in. If you are using any of these amazing editing programs for your photography, go right now and update these at the Adobe Website!

WHAT?!? You're not using Adobe software?
Adobe has been making the premier photo editing software for over 10 years now. Professionals across the industry use Adobe's suite of software for the media and design industry:

  • Photoshop CS4 and Illustrator CS4 for graphic design
  • Dreamweaver, Flash and Acrobat for web design and online media
  • Premier Pro and Aftereffects for video and special effects
  • Lightroom for specialty photography effects and fine tuning as well as editing and archiving.

Yes, most of these are a bit pricey (up to $2499 for most recent Creative Suite 4 Master Collection) but a few of these are definitely worth saving up for, especially Lightroom 2 if you are a wedding photographer. Your clients will thank you! Lightroom 2 is retailing for just under $300 for the full version right now and I would suggest buying this before you buy another single piece of gear. Good photo editing will make or break your business!

Budget conscious photo editing alternatives:
For those of you who can't afford to make the investment right now, you should at least look into Adobe's value versions of their most popular software usually retailing for under $100. The two titles worth looking into are Adobe Photoshop Elements 7 (graphic design and photo editing) and Premier Elements (for video editing). Both provide all of the essential Photoshop or Premier tools without all the complicated steep learning curve and obscure features that some say you need but will never use.

A few non Adobe alternatives that I would recommend are:
  • Gimp - Gimp is one of the most popular and powerful open source (free!) graphics and photo editing software out there for a few years now. Some even argue that it rivals many of Photoshop (full version) features.
  • Paint.net - innovative user interface with support for layers, unlimited undo, special effects, and a wide variety of useful and powerful tools. An active and growing online community provides friendly help, tutorials, and plug ins.
  • Corel Paint Shop Pro X - retouch, Camera RAW support, color changer, noise removal
Most of these are less than $80 or FREE! So there's no excuse anymore. Get one of these programs and learn it. Having good photo editing software and knowing how to use it puts your photography well above "uncle Jim's" who's pictures are not well framed, red eyed and over exposed. You have the power to fix all of these little problems if you have a good photo editor.

Next time: Free online photo editors for working on you photos "in the cloud".

Creative Commons License


Thursday, February 26, 2009

Do You Have A Business Card?

Posted On 2/26/2009 12:18:00 AM by suctionhorse 1 comments

I just got my new business cards in from VistaPrint the other day so I thought I would share a few secrets with you all about business card design and use.

Why have a business card? Everybody knows who I am and I can just give them my email or phone number if they ask...

What's wrong with this statement? This person is expecting clients to flock to him like a rock star and start begging him for his email or number like crazed teen girls. Unrealistic. People won't flock to you, especially when you are first starting out. You need to flock to THEM! That means network. Talk about your business every chance you get and then pass out a business card.

Business cards are the first investment you will make with your advertising budget. This is the first introduction that people will have to your work and talent. You will be giving these out to everyone you talk to even if they are not interested in your wedding photography. Then you can spark up a word or two about your business when you hand it to them.

Essential elements of a successful business card:
  • Complete contact information - this includes: Name, title, name of business (if any), address, at least one phone number, email, and website. If there is room put a 3-4 word description of your business under the business name.
  • Portfolio Image - if you're a photographer (and I assume most of you reading this blog are...), you need to have at least one of your best images on the front of your business card. The card is like your mini-portfolio that you are handing out to show people. It also would be ideal if you can find a photo with some negative space to accommodate contact info layout. (My card above is a good example as her dress is considered negative space)
  • Website and email - VERY important in the year 2009! If you are not a techy type, get someone to make you a Facebook or MySpace page and put it here, but try to work toward buying a domain name and creating a simple website with your info and portfolios. The sad truth is that many potential clients won't consider you to be a professional if you don't have a domain name (.com). Read my post The Power of the Domain Name that I recently wrote on The Horse for more info about web domains.
  • Thickness of the card stock (paper) - believe it or not, thicker card stock gives you more credibility. Every aspect of the card links with you and your business, so if your card is on flimsy 8 or 10pt. paper someone might think that your business ethic is flimsy...

If you hand me a flimsy card, with perforated edges, I won't even consider doing business with you.

~ Doran P: a marketing agent and printer by trade.

Introduce yourself everywhere you go with your business card. Get it in the hands of as many people as possible. Hand your card to the receptionist at the doctors office, the hostess at the restaurant, or the technician at the auto repair. These cards may find their way into the hands of a decision maker and they are certainly being put to better use than sitting on your desk at home.

The point is: get some professional looking and feeling business cards made TODAY! And start seeing the results in your advertising.


VistaPrint Free Business Cards


Creative Commons License


Wednesday, February 18, 2009

Traditional vs. Photojournalistic Wedding Photography

Posted On 2/18/2009 11:38:00 AM by suctionhorse 0 comments

old wedding photo
The profession of wedding photography has evolved over the years from a simple one or two shot posed portrait (photo by Erica_Marshall) into what it is today, where the bride has almost endless options of how, who and what she wants photographed on her wedding day and the line is being blurred between "traditional" type wedding photography and a more photo journalistic approach to the wedding day. Here are some characteristics of each:

  • Traditional Wedding Photography - is more portrait based. Scenes and shots are usually set up in advance during, before or after the wedding. The subjects are posed using tried and true / pleasing to the eye arrangements.
  • Photojournalistic Wedding Photography - is more candid and photos are captured spontaneously to show once in a lifetime moments and emotion. Much like photojournalists for the media, wedding photojournalists present a story through the use of photographs.
Advantages of Traditional vs. Photojournalistic Wedding Photography
  • wedding dressTraditional Wedding Photography creates more classic and commercial / frameable type photos that a wider range of people will enjoy (ie. close ups on faces, family portraits, well framed staged events like the cake cutting).
  • Photojournalistic Wedding Photography creates more of a reality capture and true feel of the day as the photographer stays out of the way and shows details that would usually be missed. He also captures the action as it happens on the spot, bringing the emotion and fun of the day to light. While these pictures may not be classically framed or lit, they are always very artistic and bring back memories for the couple.
Most brides these days want a combination of the two styles so they can get traditional family pictures for their relatives AND have some great artistic shots for themselves.

Another evolving type of wedding photography is the Fashion Style wedding photography. This is a combination of both traditional and photojournalistic where the photographer creates pictures that look like they are inspired by editorial fashion photography as would be found in magazines like Vogue or Vanity Fair. This type is usually more involved and more expensive since the couple usually have to go to different locations either before or after the wedding with the photographer and have shots done with studio style lighting, fashion posing and professional makeup and hair.

An easy alternative to a fashion wedding shoot is another interesting trend called Trash The Dress. This involves a post wedding photo shoot where the couple dress up formally and go to grungy locations for a contemporary fashion shoot. Some also jump in the water with their dresses or explore caves and forests. These can be done with studio gear but available light (because the shoot is outside) makes these look great. Convince your bride (and MOB) to do a Trash The Dress and you'll both have a blast and some great looking pictures!


Creative Commons License


Monday, February 9, 2009

Essential Gear For Your Wedding Photography Business

Posted On 2/09/2009 03:06:00 PM by suctionhorse 0 comments

Photo by THEMACGIRL* on Flickr
I guess everyone needs a basic gear list to start up your wedding photog business. So, I'm going to give you some minimum recommendations for camera gear that you need in order to begin your photography business and look like (or at least pretend) that you are a professional and have spent time and a little bit of effort finding gear that will get you and your clients professional results.

Camera Bodies

You need at a minimum two camera bodies. I would recommend two DSLRs instead of film SLRs or point and shoots, but if all you can afford right now is a film camera instead of another $700 DSLR then bring what you can get by all means. I myself am not to the point of two DSLRs just because I can't afford another right now. So, I'm using my old Nikon F-4s film SLR for my backup. I always carry a decent point-and-shoot as well, as a 3rd backup.
If you are going to go ahead and get two DSLRs, I recommend that your backup body have the same sensor size and lens compatibility as the primary - it's too easy to get tripped up by moving between different pieces of equipment. This is a risk you don't have to take. You also need something that has a high megapixel count (10 Mpxl or better) (for enlargements that the client might want), quick handling of knobs and buttons, good low light (high ISO) handling, and the ability to shoot in RAW (for easy post processing). Some minimum suggestions are below for a few different brands of camera bodies:
As you can see most pros go with either Nikon or Canon. Both of these brands have the widest choice of options, lens options, flash and accessory options. They also handle better, last longer, and in my opinion are better made than the Sony, Olympus or Pentax bodies out there.

Lenses ("glass")

This is were most inexperienced photogs go wrong. They shell out the bucks for the body and then use the kit lens or buy the cheapest zoom that they can find. Do your own research but be sure to pick up some of the below lenses and know their characteristics and when to use them:

  • 50mm f/1.8 - this is your low light (fast) essential lens that needs to be in everyone's bag. You can get close to macro shots with this (as close as 10 inches) if you don't have a macro lens, and the depth of field is amazing on a good one. Great for low light weddings where you can' use flash.
  • ? - 300mm zoom - these usually start out at about 70mm so you can use them for your standard portraits and not get deformed faces then you can also use the 300mm side for your extra long shots in the church or from the balcony so your couple won't look like specks in the distance. Try to get the Vibration Reduction or image stabilized version to reduce camera shake.
  • 10 - 24mm ultra wide - these are awesome for grabbing shots of the WHOLE cathedral if its a big church or outside in a large open area. These also allow some creative photojournalistic shots with their fish-eye effect.
Flash

At a minimum you want an iTTL flash that has fully configurable manual settings as well and buttons that are quick and easy to see in the dark. The i TTL will just make your life easier and you need to be able to do manual settings for creative effects. Here are some great suggestions that will last a while and won't totally break your budget.
Tripods

A good heavy and steady tripod is also essential for your formal and family portraits to ensure nice tack sharp photos. Listing these could be a whole blog in and of itself. Get one that tightens up and head that is versatile enough for your needs (ball head, quick release for vertical shots). I use a Manfrotto 055XPROB Pro Tripod. I would spend no less than $100 on a good, tight, stable tripod.

Other than these essentials, I would consider anything else an optional enhancement or upgrade to save time. (Which is another blog also... ;-)

Renting is also an option if you are just starting out for your first or second gig. Most top of the line professional gear can be rented from local independent camera stores for $100 - $200 depending on what you need. That way you can get some great quality shots for your portfolio and then save up to buy that Nikon D3 (mmm... yummy!)

©Creative Commons 2009


Wednesday, January 28, 2009

Wedding Portfolios - Selecting killer shots

Posted On 1/28/2009 11:19:00 PM by suctionhorse 1 comments


So, you've shot a few weddings and have some decent looking shots that you would like to show your potential clients. How do you choose the right ones for your portfolio? Do some shots sell your work better than others?

The way I choose my portfolio shots goes like this:
  1. Go through ALL of your photos and select the best 20-30 shots of all of your pictures.
  2. Take those 20-30 shots and lay them out on your bed or a large table.
  3. Critically examine each of these shots for technical flaws (focus issues, framing, weird eyes, lighting issues, and background "noise"). If you don't know what to look for technically, check out some of these articles here and Darren Rowse's Digital Photography School.
  4. Remove any shots that are not technically great.
  5. Remove any shots that are not interesting (interesting subject, beautiful, vibrant color). You want your potential clients to be blown away by your pictures, not bored.
  6. You should be down to about 10-15 great shots now. Ask a non-photographer, female acquaintance which ones she likes best and which ones she likes least. (Women have a better natural eye for beauty. I always use this step when selecting photos)
  7. Consider removing 1 or 2 that she didn't like.
  8. You should now have your portfolio shots. Enlarge these to 5x7 or 8x12 and put them in order of best (top 5 first) to "not bad" in a nice black portfolio book. I use ITOYA 9x12 Art Portfolio books.
As far as selecting shots that sell, I try to include 10% groom shots, 10% cake and reception, 10% group and family shots, 10% couple and hands, 10% flowers, 20% bride shots, and 30% photo journalistic shots. I might revise this as time goes on but these are the shots that brides and parents want to see to decide if you are any good.

Most parents (who are paying for this) want to know that you can shoot good portraits of their daughter and some good family and wedding party shots that they can hang on their wall. In reality a monkey that has read a wedding photography book can shoot those shots, but what really draws people in and catches their eye is an interesting and artistically composed photo-journalistic shot of one of the important details of the wedding that tells a great story or a cute kid shot. That's why I include these in my portfolio. When you're done you'll have a great portfolio to show you friends, family and potential clients. And everyone knows, if you're serious enough to make a great looking portfolio, then your clients will start dishing out the serious money for your skills.


©Creative Commons 2009


Tuesday, January 20, 2009

Eat or starve at your wedding shoot?

Posted On 1/20/2009 12:32:00 AM by suctionhorse 0 comments

So, I came across this conundrum while I was shooting the Holloway wedding Saturday (some of you may have seen some of their engagement pics below and on my Flickr site)...

Should you eat during a wedding shoot?

For the past few weddings I've done, I've just gone hungry or have eaten something before hand, because I was just to shy or embarrassed to ask if it was ok and then most of the MOBs or FOBs have volunteered to get me a to-go box or something. So, I decided to do a little research and see what other wedding photogs do. Here are some of the options I found:
  • If its a short wedding, (4-6 hours) just eat before hand or bring a granola bar or energy drink with you. Some hosts will let you eat off the buffet anyways. Be sure to ask.
  • Ask the bride or MOB during your initial meeting if the wedding will be longer than 6 hours and if so, ask or have a question on your contract about whether a meal will be provided or you can take a short break to eat something off the buffet in the back kitchen.
  • If not, ask to have a short 15 minute break while everyone else is eating to eat yourself.
  • If its really important to you, or you start feeling woozy if you don't have a regular meal, put it as a stipulation in your contract that you MUST have one of the above options.
  • Explain to your hosts during the initial meeting that if they provide you a small table to eat at, you will be able to keep an eye on the wedding to make sure they aren't missing anything. If you simply leave for an hour to get something to eat, you might miss coverage of something important during your reception.
For the record, the MOB on Saturday was very generous and let me have my pick of all the buffet in a big to-go box for the road and I wasn't really starving because it was a fairly short wedding (4 hours). So, this post in no way was any fault of the Latta or Holloway family, it was just something that we forgot to discuss ahead of time.

So, that's one thing I learned this time around. What are some of you guy's experience with eating during your shoot? Did they let you? Was it discussed ahead of time? Please leave me a comment.

©Creative Commons 2009


Wednesday, January 14, 2009

How To Shoot Great Engagement Pictures In Less Than an Hour

Posted On 1/14/2009 02:46:00 PM by suctionhorse 0 comments

Bo and Adrienne by Josh Self from Flickr
So, you've met with your bride and family and booked an engagement shoot. Where do you shoot your couple? What location is right for your couple? How do I do the shoot quickly and efficiently without wasting everyone's time trying to find the right spots?
I've found the answers to these questions in the past two or three engagement shoots that I have done.

The first engagement shoot I did took 2 or 3 hours as I wandered around the location that I had picked trying to find some "great" shots as my couple looked at me like I was an idiot. So I decided not to do that again. I wasted both my clients and my time by not being prepared. Here are some tips for shooting engagements efficiently that also look great:
  1. Have 3 or 4 different style locations in your local area picked out ahead of time to tell your clients about when meeting with them initially. These could be different style locations (ie. garden, vintage, urban, farm, forest, or even more unique locations that you have found) so your client will have a few different options to choose from at the initial meeting
  2. Have test shots or portfolio shots on hand during the initial meeting from each of these locations to show your bride how awesome each location is. (I guarantee you will upsell engagement sessions this way!)
  3. Book the engagement session as early as possible, but at a time convenient to the couple. They need to use these for newspaper announcements, wedding programs, or Save The Date cards.
  4. Scout out the location ahead of time. Either a few days / weeks before or arrive WAAAY early to the location on the date chosen to scout shot locations.
  5. While scouting be sure to frame shots and find places with good depth of field and focus options. Take a few test shots to show your couple once they arrive (optional) .
  6. Don't waste time once your couple get there.
  • be friendly and make them feel comfortable (this is VERY important, and it will show in your pictures if the couple isn't comfortable with you!)
  • get down to business and communicate what you want them to do and where to go. They want you to take charge and be professional. (Remember they trusted you enough to book with you!)
  • you have your shots already scouted out right? No reason to dilly-dally (note to self: investigate the origin of that word :-). Shoot away!
  • Do some posed (looking at the camera) and a lot of candid / fun ones. They couple need the posed ones for the print media that they will be doing and the candid ones for personal use and slideshows.
The client will be impressed by your efficiency and happy that they can be done with this awkward situation quickly. Just make sure your framing, focus and all the other technical photographic techniques you've learned (you learned these right?) are up to par. Oh and remember the Rule of Thirds! HUGE! (See my photo of Bo and Adrienne above...).

After you've done 3 or 4 shot locations with 3 or 4 poses each, there's really not too many more variations on a couple shot that you can do anymore. Show the couple yours shots on the preview screen on your camera and ask them if they would like to do any more? The trick is to make sure you get some great shots in each location and pose. Once you have these, and the client likes them, you're done!

My last engagement with Bo and Andrienne took a little longer than 45 minutes! I'm not saying to be so fast that you forget shots or take quick blurry shots that are sub-par but be efficient and do it right. Your client will be thankful.

© Joshua Self Creative Commons 2009


Monday, January 12, 2009

Making The Sale With Your Wedding Photography Clients

Posted On 1/12/2009 10:49:00 AM by suctionhorse 0 comments

photo by blog.jmc.bz from Flickr
photo by blog.jmc.bz from FlickrI guess the most critical time for a wedding photographer comes, not when you get an appointment, but at that final decision making time, when your client has to decide either to go with you or "keep looking" and how to encourage your wedding photography clients to close (with YOU) on the booking/sale.
So what are some good ways to "make the sale"? I'm going to share a few that I have learned but I'm really looking for you guys to help me with some good ideas so please leave me a comment or advice on how you would do it.
So, when you've shown your client all of your portfolios and have given your sales pitch, its down to your potential client making their final decision. I've been reading just some general sales articles and ideas that could apply to wedding photography, so try some of these:
  1. "Does this sound fair to you?" / use final closing phrases. Read this great article from the Missouri Small Business Development Centers for some great tips on closing a sale.
  2. Ask them which package they would be interested in. Giving them choices helps put them in the mindset of having already made the right choice of YOU!
  3. Offer to beat the price of any competition... even if its by $50 or $100. (I've gotten 2 wedding bookings this way!)
  4. Offer to add freebie's if the negotiation is going sour... (free or discounted engagement shoot, free 8x10, etc...)
  5. "Do you think that this (option) would be something that you would be interested in?"
  6. Know you client's potential "wants" as well as their needs. (ie. Brides want to look like models in a magazine, needs would be: Traditional group photos for grandma's picture window.)
  7. Don't be too anxious or nervous. People can smell desperation. Be yourself. Be honest. Let them know upfront what they are getting. Write out and practice some key selling points that you will talk about ahead of time if you are the nervous type.
  8. Finally, be prepared for the close. "Let's get this paperwork out of the way, so I won't waste any more of your time..." (actually have all the paperwork printed out so that its easy for the client to fill out and it answers all your questions about the "when" and "where")
In closing: Be organized, be yourself, know how to provide a solution to your client for their needs AND wants, then know and practice closing.

Please leave me a comment if you have any other good suggestions for closing a sale and I'll add them on here!


Wednesday, January 7, 2009

What's The Best Photography Gear For The Money

Posted On 1/07/2009 12:26:00 AM by suctionhorse 0 comments

What is your annual budget for buying camera gear? Mine is about $0. I have no budget for buying new gear. What I do is buy my gear piece by piece as I get paid for gigs.
So, if you are like me (limited income, limited budget, economic downturn, penny pincher), you might be asking the question, "What kind of gear can I get that is good enough to look professional and produce professional results without maxing out 3 credit cards?"

I would love to list off all the high end camera bodies and flash systems that the unlimited budget people use, but that's not going to help you. I'm also not going to waste time telling you about Wal-Mart super sales. To get professional gigs, you need professional gear, not the cheapest you can find. Here are some suggestions and reviews from my personal experience of gear that is in my camera bag (or lack thereof).


Nikon SB-600
I just got this flash recently and its been a great help to all of my low light photography. I would definitely suggest a shoe-mount flash for your SLR or DSLR. Don't ever use the pop up flash except for emergencies. The light from pop-ups are either way too harsh and shadow forming or not powerful enough when you need them to be (plus they wear your camera battery down alot quicker). The SB-600 is a great high to middle of the road flash and its made by Nikon so you know you're getting good quality. Some key features are:
  • newest i-TTL system optimized for use with Nikon's Creative Lighting System (CLS).
  • Flash Value Lock (FV Lock) allows photographers to change the composition or zoom of the shot while maintaining the desired lighting of the subject.
  • High Speed Sync Mode available with Nikon CLS compatible cameras with high speed sync capability.
  • Flash color information (sent to your camera) for more accurate flash control.
  • Lens coverage of: (Auto) 24 - 85mm, (Manual) 14mm - 85mm
  • Recycling time of Approx. 3.5 seconds (manual, w/R6 (AA batteries), 4.0 seconds (Lithium Ion AA batteries), 2.9 seconds (NiCd AA batteries), 2.5 seconds (Ni-MH AA batteries)
Price is right around $175 on Adorama and B&H right now.

I'm shooting a wedding next Saturday so this arrived just in time. I always learn new stuff at weddings so I'm sure I'll blog about what I learned this time here.

In the mean time check out my other blogs and stay tuned for more sage advice from ... me.


Monday, January 5, 2009

What The Duck becomes syndicated nationally!

Posted On 1/05/2009 11:54:00 AM by suctionhorse 0 comments


WTD! This is my favorite photog comic on the net! Everyone subscribe now!
From what I hear, he just got syndicated today. Congrats Aaron!


Essentials For Booking Weddings For Photographers

Posted On 1/05/2009 02:37:00 AM by suctionhorse 0 comments


The other day, I got a surprise phone call for a wedding photography shoot in January. She was referred by a bride's mother from a wedding that I shot last year. Since I wasn't expecting any new business until Spring, I found myself a little rusty and unprepared on the business and sales side.

So I thought I would post a few tips for all you wedding photographers, to make sure you guys attract and KEEP your business rolling throughout the year, not just Spring and Summer.

Before meeting your potential client, be sure to have an answer for these questions (because I've been asked them hundreds of times):

How much do you charge?

This one may be tricky to determine, but it usually depends on your experience, the quality of your portfolio and if you came highly recommended. My advice start free... yes free, for your first wedding.
  1. Charge only for the price to develop or print out your photos and the price of the proof book. Put the best of the best from that shoot into your portfolio.
  2. Then, the next wedding start low-balling. I'm talking about ridiculous prices ($100 -$200). And explain to your client that you are "just starting out" and to give you a chance and you'll give them their money's worth and much more. Then give the client a full workup package (unlimited hours, six 8x10s, two 11x14s, etc...). Basically you won't make any money off of this shoot either... BUT now you have a GREAT looking portfolio and your client will be proclaiming your generosity to the world!
  3. Make sure you have pimped your name out to your first clients with extra business cards and freebies, asking them that, in exchange for your low price, would they mind giving a testimonial that you could quote and use in your marketing and to please pass my name around to anyone they know that has a wedding coming up.
  4. After 2 or 3 weddings like that, you'll have an AWESOME portfolio that will sell itself and you can slowly start charging "regular price" and putting together packages to maximize sales.
Why are you so expensive?
There should be several reasons that you can explain to your client the big WHY in wedding photography:
  • Intangible Artistry. Photography is a skill and an art. A professional doesn’t simply memorize what all the camera buttons do; you are able to capture the beauty and emotion of your client's day in a unique way. Good photos are more than just technically correct, they are the culmination of the skills you have learned and your creative "eye".

  • Like professionals in any other field, wedding photographers have worked out their pricing system for a reason, and it's not just to part your client from their money! Professional photographs are a wonderful way to capture memories. They are not essential, but they are priceless. A good photographer will provide the client with photos that are worthy of becoming part of their family's history.

  • Equipment. High quality camera bodies can cost $5,000. Lenses can cost $1,000 each. And at 2,000 to 3,000 frames per wedding, even a good camera will need to be replaced every couple of years not to mention flashes, light meters, tripods, camera bags, etc...
  • Hidden Work. Every meeting with potential clients is an investment of his time, whether you get the job or not. You will spend time with them before the wedding to go over your plan for the day, the shot list, and the design of any albums you may wish to purchase.

  • Once the wedding is shot, you will spend hours editing, retouching, and color-correcting hundreds of images and then creating an album and/or online gallery of the final wedding photos.

What do I (the client) get if I go with you?
This is up to you and how much you are charging. But make sure your client knows the answer to this up front.

How long will/can you work?
Make sure there is an hour limit or hourly rate in your contract (charging for overtime after a certain amount of time), or you'll be at the reception till the cow's come home... literally.

Do I get the (digital) negatives to make copies for myself?
According to federal law, images produced by a professional photographer are copyrighted the moment they are created. Federal law prohibits copying or reproducing copyrighted material without permission from the owner of the copyright, i.e., the photographer. If a client copies or scans your photos, the photographer should be paid just as if they were buying reprints. If you or your videographer transfer the proofs to videotape, the photographer should be paid just as if you were buying reprints.

BUT, photographers are free to negotiate and sell their negative rights away to the client for free or for a fee. I suggest negotiating a minimum fee for the rights that would be the same price as a client would spend purchasing reproductions or enlargements from you. That way you both come out ahead and the photographer doesn't lose enlargement sales.

What kind of packages do you have?
Be creative with this, but there are some standards. Have "Small, Medium and Premium" type packages and make the Premium package be a better deal for the client (give a slight discount for the individual items). Then they are more likely to buy the Premium.

Next time:
How to encourage your clients to close on the wedding booking/sale...